In the previous tutorial I gave you a guide to getting textures on to your prims. In this tutorial, I’ll show you how to change the appearance of the applied textures.
Let’s start with the simplest, but most frequently-used options — the Repeat options. These allow you to set how many times the texture will repeat across each face (or the selected face) of the prim.
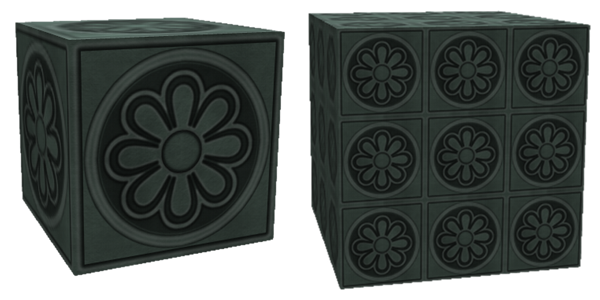
Here are two boxes with the same texture, the first one with both repeats set to 1, and the second to 3 each. The most common use for this is where you have a simple, small texture which you want to use to cover a large area.
What happens when you resize the prim that the texture is on? The answer depends on whether you have the ‘stretch textures’ box ticked or not. If you tick this box, and then resize the prim, this is the result:
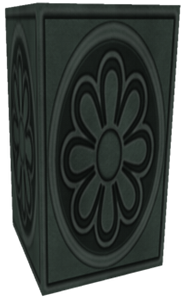
If the ‘stretch textures’ box is unticked, you get the following:
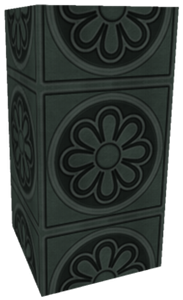
This might seem a surprising result. It is because textures are centered on the prim face, rather than being anchored to the top-left. However, this leads very neatly on to the next feature — Offset.
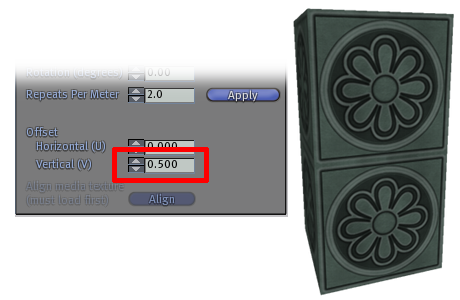
The texture offset fields are near the bottom of the build dialog. The offset amount is a fraction of the size of the texture, so an offset of 1.00 will have not effect — the texture is moved by it’s complete width or height.
Because textures are centered on prim faces, offsets should be thought of as offsets from the middle. In our example above, we want to shift the texture by half it’s height, to align it to the top of the prim, like so:
There is another way of setting the repeat for textures, which works in a slightly different way, and can sometimes be very useful. This is the ‘repeats per meter’ setting.
To show the effect, let’s have an example:
This archway looks fine from the front, but the texture on the sides is wrong. This is because the texture is set to repeat 1 x 1 horizontally and vertically. The sides of the arch are narrower, so the texture gets ‘squashed’. Now, it would be possible to fix this by changing the repeats on the side (by selecting the side texture only — see the previous tutorial to find out about ‘select texture’).
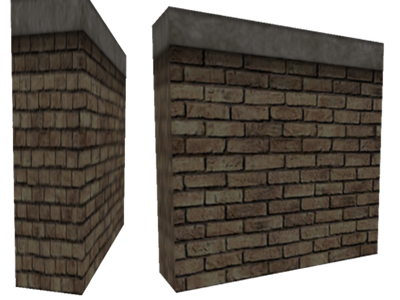
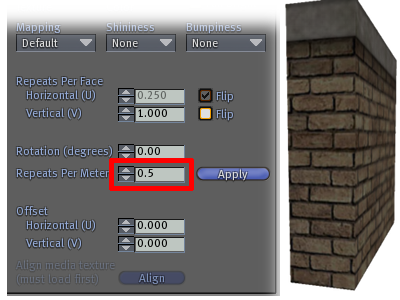
However, there is an easier way, using ‘repeats per meter’. Setting this to 1.0 (in this case), and then clicking the ‘Apply’ button will size the texture so that it repeats every 1.0 meters. Because the prim in this case is 1m x 0.5m, the front and back will remain unchanged, but the texture on the sides will now display correctly:
Ok, I think that will do for this tutorial. Happy texturing!
Leave a Reply
You must be logged in to post a comment.